With Lightroom CC, you can choose how you want your images to be stored, but the major focus of Lightroom CC is that all images should be available at their full resolution. Lightroom has some added features, this includes: HDR, Pano, and HDR Pano merge tools, and a new Target Adjustment Tool. Lightroom CC does not need too much space on your hard drive. With Lightroom CC, you can create many edits of the same image without having to worry about how it is going to be stored. It also has some organization features that allow you to arrange all your pictures so that you can retrieve them easily.
Overview- Adobe Lightroom CC
** Official website : https://www.adobe.com
Pros And Cons Of The Adobe Lightroom CC
Adobe Lightroom CC Pros
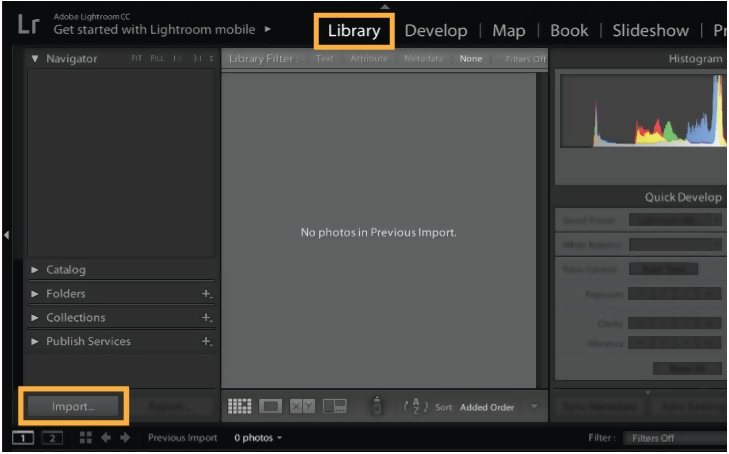
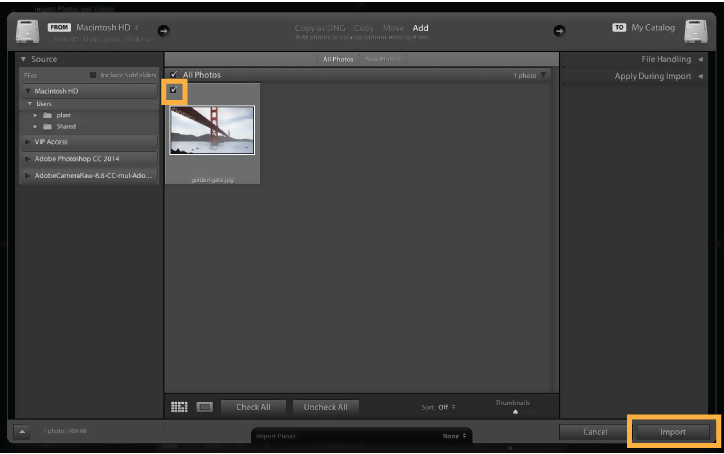
Importing Photos
When you insert an SD memory card, neither Classic nor Lightroom pops up as an Auto-play option. Lightroom Classic CC has existed over the years to function as photo management and editing powerhouse. As a professional photographer, they are chances that you take various types of images. Regardless of what you capture, Lightroom CC is here for you. If you are looking for creative ways to capture and deliver many pictures a week or ways to share and organize family travel pictures, Lightroom CC will make work easier for you. When images are imported to Lightroom CC, they get uploaded to Adobe’s Creative Cloud servers by default. Users can know how much of their image library is stored in a local space on the computer and this is 25% of the remaining space on your hard disk. Immediately you import your images, they are organized in a more streamlined and simpler way than they are in Lightroom Classic CC. A more organized structure or folders can be created for your image library. Adobe Sensei can search and analyze your images because they are stored on Adobe’s cloud servers. Sensei helps to identify and detect objects in images. With the combination of Adobe’s Sensei-powered AI object recognition, Lightroom CC can search for images. Lightroom CC has a big import button and also a media auto-detect, the presence of the auto-detect helps to launch the nondestructive importer. This enables users to see full-size images on memory cards before importing them. You can start working on any image in the set before the import processing is completed; this is also seen as a benefit for users. Lightroom CC import images by utilizing a database, referred to as catalog. This database is very ideal for photographers who have a huge collection of large images; the database file can be stored separately from the exact image files. When importing, you can copy, add or move. While the import is going on, the program can build Smart Preview for quicker editing, add to a collection, apply a preset or ignore duplicates. There is another way you can import pictures into your computer, this is called tethering, and it allows your camera to be connected with a USB and controls the shutter release from the computer.
Special Editing tools
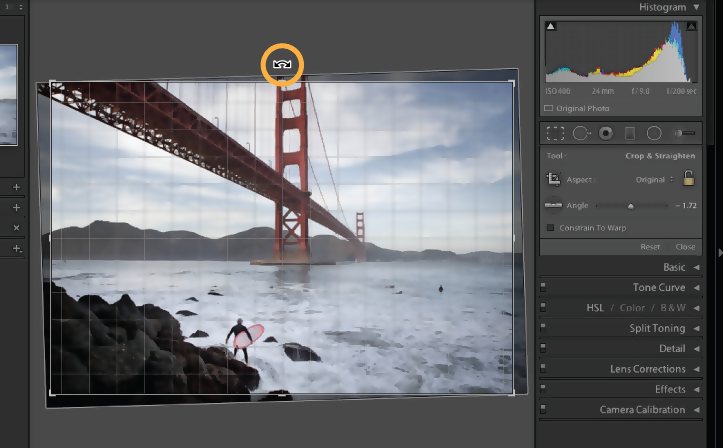
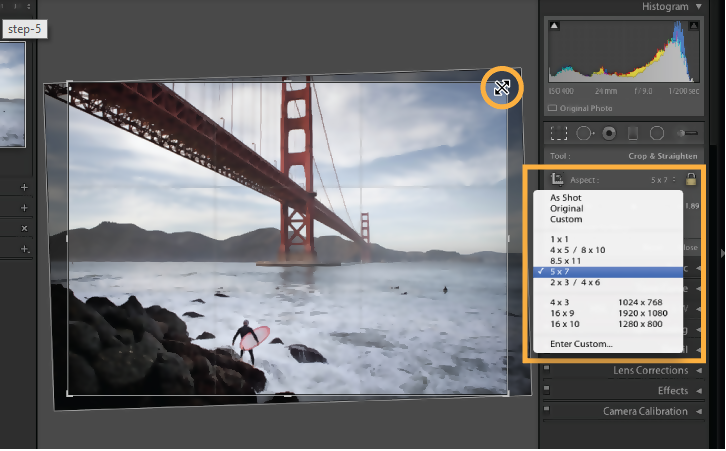
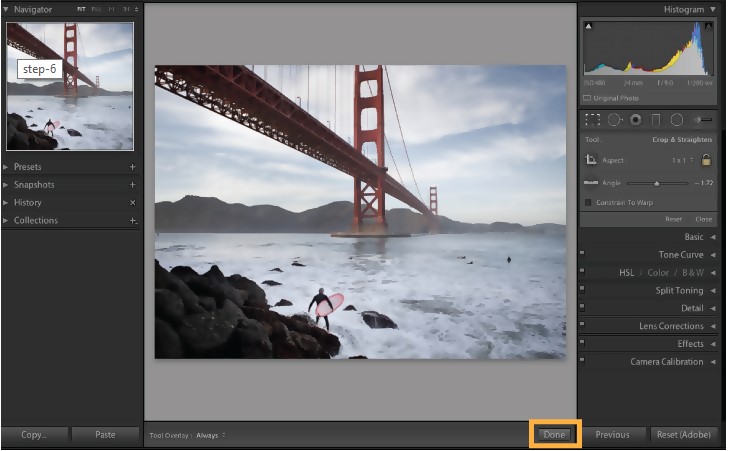
You can access the editing tools through the fly-out panels on the Screen’s right side and they are well arranged with a modern look. The Edit panel consists of Color, Profile, Optics, Effects, Light, and Geometry sections. There are also crop and rotate tool and the healing brush tool. There are also tools for local adjustment options in Lightroom, this includes the Brush tool, Linear Gradient, and Radial Gradient. There is also the presence of Target Adjustment Tool in Lightroom CC, this enables you to drag up or down certain tones and colors in the picture to adjust them in the Color Mixer, Tone Curve, and B&W Mixer panels. Lightroom CC has got advanced editing tools like Graduated Filters, Adjust Brush, Range Masking, and Radial Filters. Cropping and straightening images are basic steps to processing images in Lightroom. I love the fact that Lightroom utilizes non-destructive editing; i.e. original photos are kept safe. Any alteration such as cropping or straightening made to images does not transform the original image. If you want to open the Crop and Straighten panel, click the Develop tab at the top of your workspace. Select the Crop & Straighten tool icon in the toolbar, another way you can open the crop and straighten tool icon is to press “R” on your keyboard. There are several ways images can be straightened in Lightroom. The fastest approach is moving your cursor to the crop guides, click on it and rotate. You can also straighten images by dragging. Another accurate way is utilizing the straighten tool, you can also set precise numbers or use the slider. Cropping is done in the Develop Module of Lightroom. In the Develop Module, click the Crop icon. Once the crop tool is clicked on, you will get new guidelines and the crop& straighten options will drop. Dragging the guidelines to where you want is the fastest way to crop. You can drag sideways, from all corners. The Crop & Straighten tools are the basic step used by photographers when editing pictures. This tool is very useful for straightening crooked images and cropping an image. To export your photo, you can choose File > Export.
Clean Interface
Lightroom has got a clean interface, although it starts simple and shows more complex tools as you progress. When running it at first, the Lightroom splash screen pops out and thereafter the window begins to fill with a tile view of all the pictures on your system. Photos can be switched to a contact-sheet view and arranged in terms of capture date, modified date or import date. The adjustment and organization tools are concealed behind box and control slider icons. The adjustment panel and organization panel do not show simultaneously when you open one of the panels, the other closes. This can be changed by switching the panels from Automatic to Manual. It is quite easy to use Lightroom buttons and controls through touch, to zoom a picture; you can tap the picture.
Cost: (Is It Cheap Or Expensive?)
For users, we have at least three choices when purchasing Lightroom. The lightroom plan goes for $9.99 monthly and 1TB of online storage is included in the plan. The photography plan also goes for $9.99 monthly, with this plan you have Lightroom, Lightroom Classic and Photoshop, the only disadvantage is that it includes only 20 GB of cloud storage. Opting for the full package which has 1 TB online storage will cost you an extra $10 monthly. You can obtain all three programs with a $52.99 per month Creative Cloud subscription.
New Upgrades
Enhance Details
Enhance Details is a new tool in Lightroom, it is for raw camera files. To clarify some complex parts of a photo, this tool utilizes machine-learning support in macOS and Windows. Enhance details can be accessed from the photo menu and then a dialog pops up with a detail view of your shot. Running this creates a new DNG file. This process has an estimated time it takes to complete, although the estimated time is 10 seconds, the tool requires more than that.
Face Detection
Face recognition and detection is another amazing feature Lightroom has got. You can start this feature by clicking on the face icon in the toolbar in the Library mode or clicking on the software nameplate at the top left and selecting Face Detection from the dropdown. The former provides options to start looking for faces in the whole catalog. Once it has detected all the faces, type a name into the box with a question mark below the picture and it shows right up in the Named People section. Once you name few faces, Lightroom suggests names for unnamed faces. Lightroom functions well at detecting and recognizing faces.
Raw Profiles
When you work with raw camera files, you have the freedom to correct images. It allows you to transform the white balance of the image and enables you to bring out information in underexposed areas. With Lightroom, raw data from the camera sensor are translated into images that can be viewed. Profiles consist of two categories, these are creative and raw. The raw group includes Camera Matching Profiles and Adobe Raw, while creative group includes Vintage, Artistic, Modern, Legacy, and B &W. The creative group works with JPG images, while the raw profiles work only with raw pictures. Adobe Raw group consists of Monochrome, Vivid, Portrait, Landscape, Standard, Adobe color and Neutral. Adobe Color is the default for newly-imported images. Camera Matching Profiles are designed to match what you see on Camera LCD. Creative profiles look like that of Instagram filters. It has got names such as Modern 04, Artistic 01 and the likes. Creative profiles add moods to images.
Range Mask Selection
Lightroom features Range Mask local adjustment selection tool that can utilize color or luminance to refine a selected area you made with Radial Filter, Adjustment Brush or Graduated Filter. It reduces or extends the selected area in terms of light or color. You can utilize a dropper to choose the color you want.
Installation Guide
Steps to Download and Setup the Adobe Lightroom CC
Step 1:
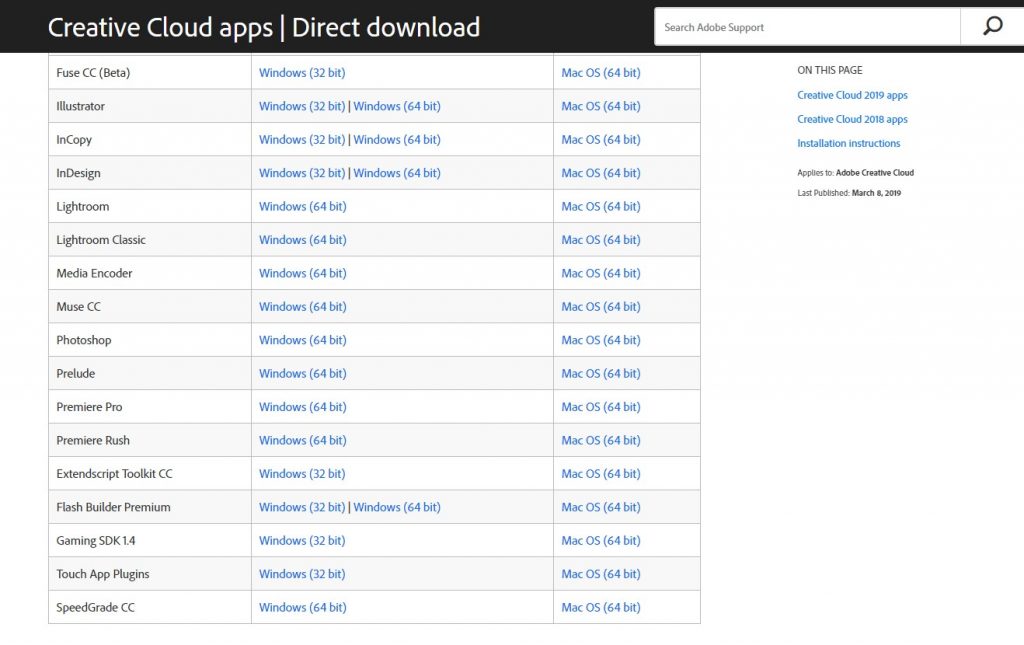
Visit https://helpx.adobe.com/download-install/kb/creative-cloud-apps-download.html website, download the software and select the most recent version at the top. Next, select the right operating system and click the download button, then you can now save at the preferred location you want to download.
Step 2:
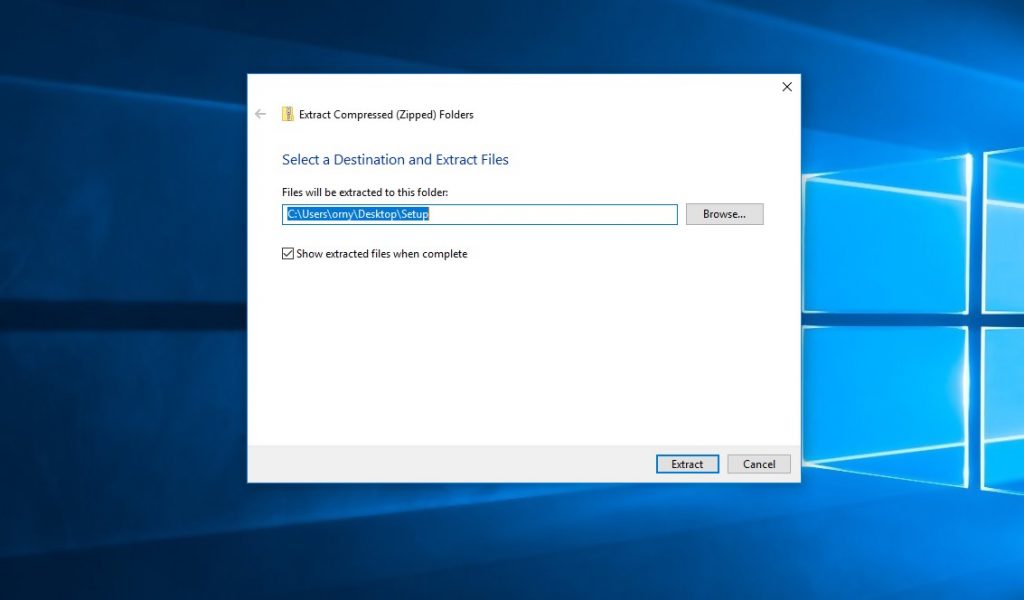
You need to unzip the folder after you’ve downloaded it.
Step 3:
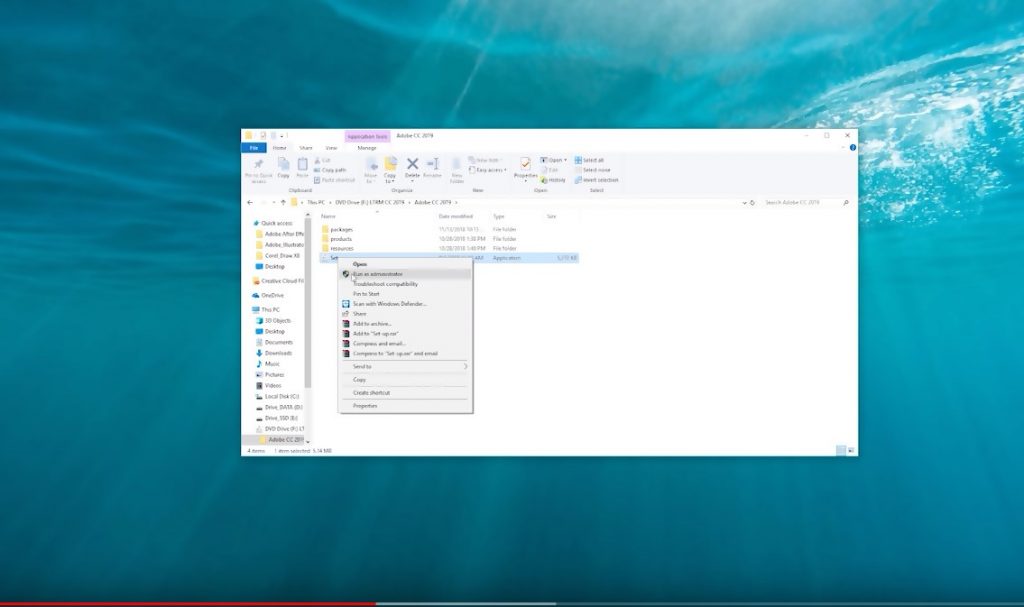
After unzipping, go to the folder, select the setup file, and then run it as administrator.
Step 4:
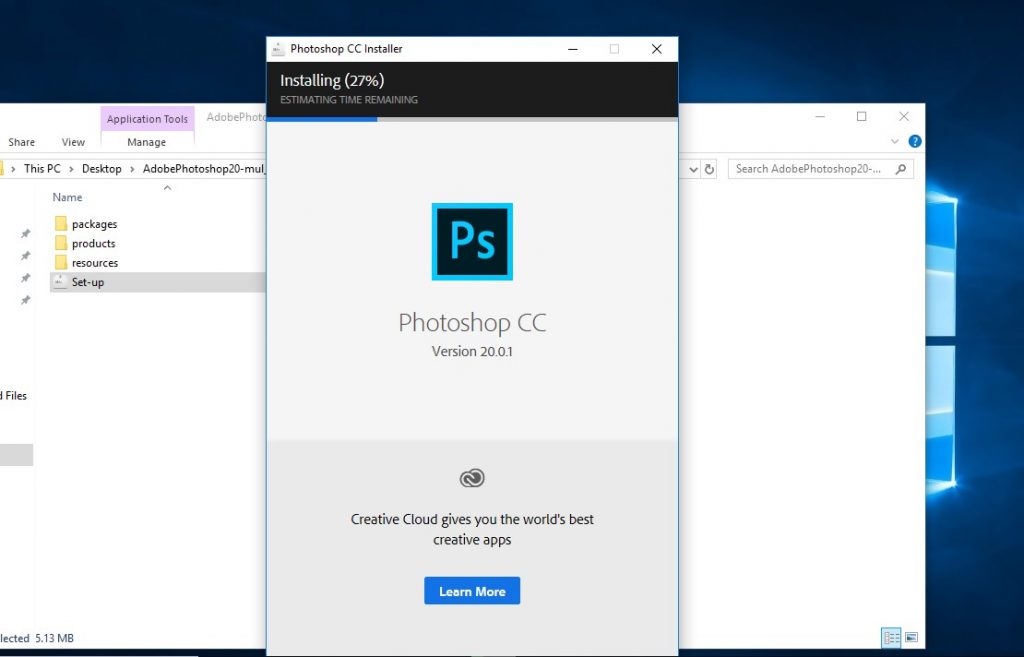
Click on setup, then the software starts installing
Step 5:
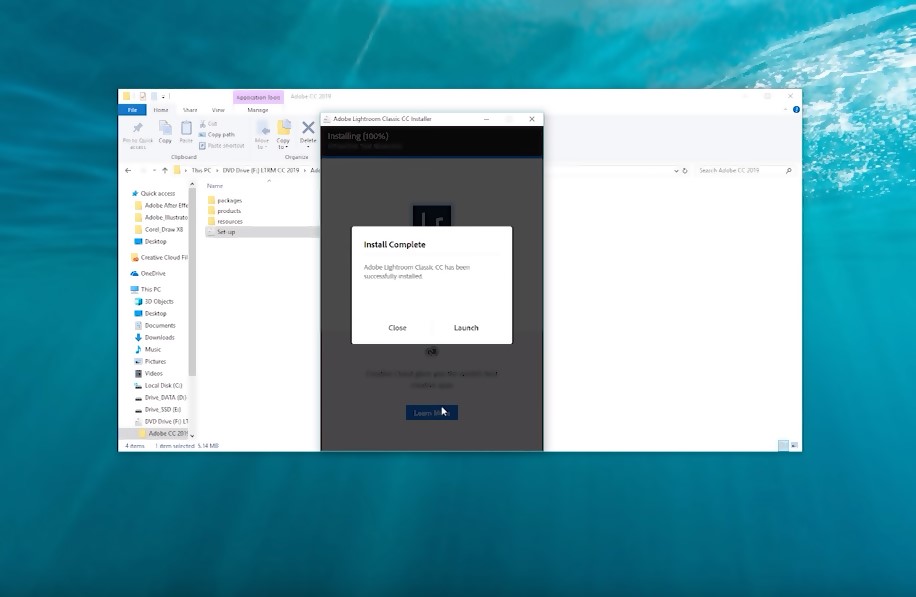
Click on Launch
Do We Recommend?
It is no doubt that Lightroom CC has got very amazing features and interface. Lightroom CC is at the top and has become more advanced with the inclusion of raw import profiles. This program is loved by professional photographers because of the transformation it does to images. It has got more advantages than disadvantages. I really love the interface of this program.
Submit your own review